As a trusted manufacturer of high-performance brake components, MIXHY understands that brake discs are the unsung heroes of your vehicle's safety system. Knowing when to replace them, how to install new ones correctly, and how to extend their lifespan can save you money and ensure reliable braking.
When to Replace Brake Discs: Recognizing the Warning Signs
Brake discs don't last forever. Ignoring wear can compromise safety and lead to costly repairs. Here's when to consider replacement:
Thickness Below Minimum Spec
Visible Damage
Deep grooves or scoring: Caused by worn brake pads or debris.
Cracks or warping: Overheating or hard braking can distort discs.
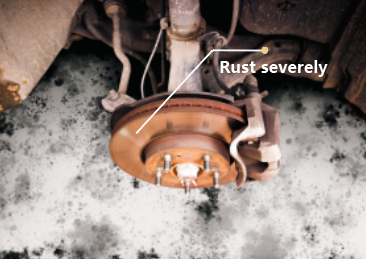
Severe rust: Except normal rust, pitting or corrosion near edges weakens structural integrity.
Performance Issues.
Vibration or pulsation when braking (indicative of warped discs).
Squealing or grinding noises (though often linked to pads, discs may also be culprits).
Mileage Threshold (Most discs last 30,000–70,000 miles).
Step-by-Step Guide to Replacing Brake Discs
Follow these steps to install new discs safely. For optimal results, pair your project with MIXHY painted brake discs, designed for effortless installation and unmatched reliability.
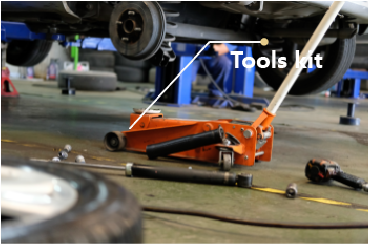
Tools You'll Need:
Jack and jack stands
Lug wrench
C-clamp or brake piston tool
Torque wrench
Brake cleaner
New brake pads (recommended for pairing with fresh discs)
Step 1: Remove the Old Brake Disc
Secure the vehicle: Park on level ground, engage the parking brake, and loosen the lug nuts. Lift the car with a jack and place it on stands. Remove the wheel.
Detach the caliper: Unbolt the brake caliper and hang it with a wire (avoid straining the brake hose). Remove the caliper bracket if necessary.
Remove the old disc: Slide the disc off the hub. If stuck, gently tap with a rubber mallet.
Step 2: Prepare for Installation
Clean the hub: Use brake cleaner to remove rust and debris. A smooth surface ensures proper alignment.
Inspect components: Check wheel bearings and seals for damage. Replace if needed.
Step 3: Install MIXHY Brake Discs
Mount the new disc: Slide the MIXHY Brake Disc onto the hub. Our discs feature pre-coated anti-corrosion layers and laser-etched installation markers for hassle-free fitting.
Reattach the caliper bracket: Secure bolts to the manufacturer's torque specs.
Compress the caliper piston: Use a C-clamp to retract the piston, then reinstall the caliper over the new disc.
Step 4: Reassemble and Test
Reinstall the wheel: Tighten lug nuts in a star pattern. Lower the vehicle and torque nuts to spec. Bed-in the brakes: Drive cautiously for the first 200–300 miles, avoiding hard stops. This allows pads and discs to bed-in evenly.
Brake Disc Maintenance Tips
Maximize the longevity of your MIXHY Brake Discs with these practices:
Pair with Quality Brake Pads
Cheap pads wear unevenly and accelerate disc wear. MIXHY offers compatible pads designed to work synergistically with our discs.
Clean Regularly
After off-roading or driving in harsh conditions, rinse discs (once cooled) to remove abrasive dirt and salt.
Avoid Overheating
Descend steep hills in a lower gear to reduce brake strain.
MIXHY's advanced venting design dissipates heat 20% faster than standard discs, minimizing warping risk.
Routine Inspections
Check discs every 10,000 miles or during tire rotations. Look for uneven wear, cracks, or rust spots.

